There is a lot you can get done on Chromebook as the Chrome OS gives room for Web Apps and Android App so you can do more. For those who have always used Windows-based products, it may not be a smooth transition as you may miss some of the Windows features in Chromebook. Or, maybe you are just missing the familiarity of Windows.
You might not have thought it was possible, but you have a few different options for bringing some of those Windows features to your Chrome OS devices.
There is a multitude of ways to make this work and we can show you where to go. On this article, you will learn how to install Windows OS on a Chromebook.
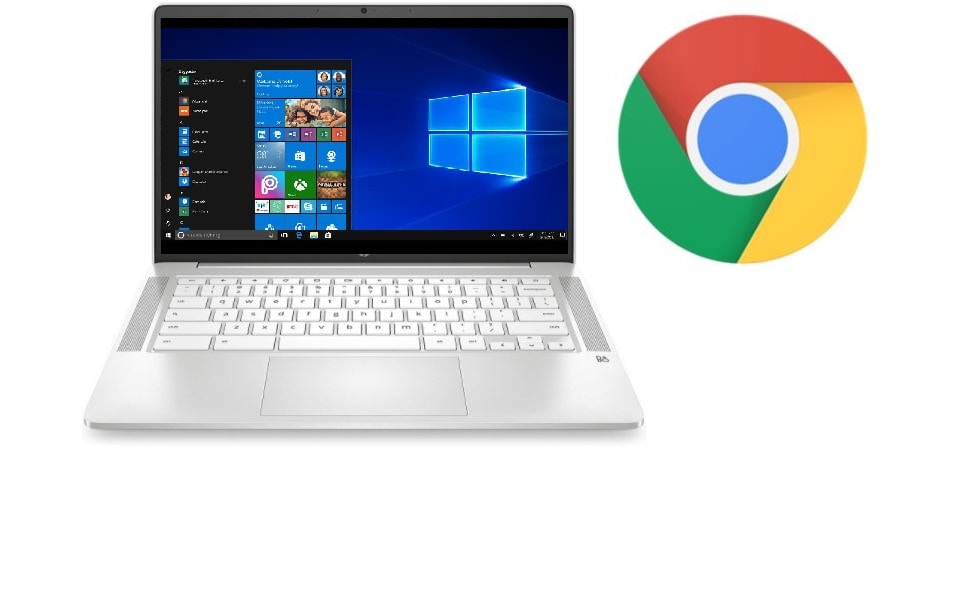
Warning Note
When you have decided to install Windows OS on your Chromebook, you need to keep in mind that installing Windows 10 on a Chromebook is difficult, and the result may not be great.
For starters, manufacturers select specific components that complement Google’s lightweight, web-centric OS. Most mainstream models have less than 64GB of space, around 4GB of memory, and no dedicated graphics chips.
Both Google nor Microsoft do not support Windows 10 running on Chromebook-focused hardware. That means you may not find Microsoft-certified drivers and must fall back on possible third-party solutions. The biggest issue regarding Windows 10 on Chromebooks, however, is the process of installing Microsoft’s platform.
Most Chromebooks include a write-protect screw on the motherboard that prevents you from installing any operating system. To get Windows 10 on the device, you will need to remove the bottom shell, remove the screw from the motherboard, and then flash new firmware.
Moreso, Chromebooks may not even have the hardware to support Windows 10. To determine if your Chromebook is compatible, check out CoolStar’s list.
With all that in mind, it is always worth considering our list of alternatives further down this article if you don’t want to completely hack your Chromebook. If you still want to learn how to install Windows on a Chromebook, though, read on.
Before setting off on this grand hacking adventure of setting up Windows on your Chromebook, you should back up any important data or files you have on the device. Messing with your operating system, firmware, and BIOS can have serious effects on your system, and you could lose anything that is not otherwise protected.
If something does happen and you find yourself unable to use your Chromebook, you can create a USB drive from another computer to try and recover the system. This will erase all of your data though, so backups are a must. Use Google Drive if you do not have an external drive handy.
How to Install Windows 10 OS on a Chromebook
Here are the tools you need to install Windows 10 OS on Chromebook:
- A screwdriver.
- 1x USB drive for Windows 10 installation media.
- 1x USB drive to back up the Chromebook firmware and store downloaded drivers.
- A second PC to create the Windows 10 USB installer drive and download drivers.
- A USB-based mouse and keyboard.
Next, search online to find the write-protect screw’s exact location in your specific Chromebook model.
Step 1: Hold down the Power button until the Chromebook turns off.
Step 2: Flip the Chromebook over and remove the bottom shell.
Step 3: Locate and remove the write-protect screw.
Step 4: Put the bottom shell back on the Chromebook and plug in the power adapter.
Step 5: Press the Esc + Refresh + Power buttons to turn the Chromebook on in Recovery Mode.
Step 6: When the screen says “Chrome OS is missing or damaged,” press the Ctrl + D keys.
Step 7: Press the Enter key to turn OS verification off.
Step 8: The Chromebook should reboot into Developer Mode. When the screen states “OS verification is OFF,” press the Ctrl + D keys to boot into Chrome OS.
Step 9: After booting into Chrome OS, press the Ctrl + Alt + T keys simultaneously. This opens the Terminal.
Step 10: Type shell and press the Enter key.
Step 11: Type the following command and press the Enter key to download and run a script file with root privileges: cd; curl -LO https://mrchromebox.tech/firmware-util.sh & sudo bash firmware-util.sh
Step 12: Type 3 and press the Enter key. This selects the Install/Update Full ROM Firmware option.
Step 13: Type Y to continue.
Step 14: Type U to install the UEFI firmware.
Step 15: Insert a USB drive to create a backup of the Chromebook’s current firmware.
Step 16: Turn off the Chromebook after the new Windows-friendly firmware installs.
Step 17: Go to your second PC and follow the instructions in our separate article, How to download a Windows 10 ISO file legally and install Windows 10 from it. You essentially use another USB stick to create a bootable drive that will install Windows 10 on the Chromebook.
Step 18: On your second PC, head to CoolStar’s website to see what Windows-based drivers you will need to install on the Chromebook. Find them and download them to the USB drive you previously used to back up the Chromebook’s original firmware.
Step 19: Connect a mouse and keyboard to your Chromebook and then install Windows 10 from the bootable USB drive.
Step 20: Once Windows 10 is installed, remove the installer USB drive and insert the USB with the downloaded drivers and update accordingly.
Alternatives: How to Install Windows OS on a Chromebook
Here are other methods to get the Windows-like hack-free experience without opening the Chromebook and installing new firmware.
Microsoft’s Free Apps Method
If you are primarily interested in accessing Microsoft’s office apps and don’t really care about any of the other Windows 10 apps, this is by far the easiest option.
Step 1: Launch the Chrome browser and navigate to the Office website.
Step 2: Log in to your Microsoft Account. You must have an account to use these free web-based apps.
Step 3: Select the web app listed on the left. It opens in the same tab — no downloads necessary.
Chrome Remote Desktop Method
Chrome Remote Desktop is a software that simply allows users to access another desktop while using your Chromebook. Here, the Chrome Remote Desktop lets you stream a Windows 10 PC to your Chromebook while enabling remote interaction via a mouse/trackpad and a keyboard.
The key to this method and the caveat is that you need that second Windows 10 machine connected to the internet. That is the only way this works.
Step 1: With Chrome open on the Windows 10 PC, type the following in the address bar: remotedesktop.google.com/access
Step 2: Click Download listed under Set Up Remote Access. This downloads and installs the host software.
Step 3: Choose a PIN with six or more digits and then click the blue Start button.
Step 4: Wait for the Windows 10 PC to read “online.”
Step 5: On the Chromebook, make sure it’s logged in to the same account, and type the following address in Chrome: remotedesktop.google.com/access
Step 6: Click on the shared Windows 10 PC displayed under Remote Access.
Step 7: Enter the PIN you created on the Windows 10 machine and press the Enter key.
Step 8: Given screen sharing isn’t ideal in the Chrome browser, click the square icon with the angled up arrow in the address bar to move the screen to the Chrome Remote Desktop app.
Step 9: Click the blue and white button tucked away on the app’s right (or left) edge.
Step 10: Make the necessary changes, like selecting Full Screen, enabling clipboard optimization, and more.
You should now have remote access to the Windows 10 PC. You can move the cursor with the Chromebook’s trackpad, and type on the keyboard as usual. On the Windows 10 PC, you will see a small pop-up with a Stop Sharing button.
This is a very good remote desktop app, but remote desktop solutions still have their pitfalls. They are highly dependent on internet connections and can experience delays at times. This works best if you have a high-speed internet connection between both computers.
CrossOver Method
Using CrossOver method, by CodeWeavers, is a software solution that allows you to run specific OS apps on other operating systems. That includes running Windows software on your Chromebook.
Due to the software requirements involved, CrossOver is not available for everyone. Specifically, you can only run it on Intel-based Chromebooks. If you want to involve any Android devices or apps, they need to be compatible with Android 5.x or later. Also, certain functions like mouse locking will not function.
Mind you, CrossOver is not free. The current full version costs $40, whereas you can get the full version with 12 months of updates for $60. If you have money to blow, you can spend $500 to get the software with lifetime updates. At that price, however, you might as well buy a Windows 10 PC.
Here are the steps on How to Install Windows OS on a Chromebook using CrossOver method
Step 1: Enable Linux by opening the Chromebook settings and selecting Linux (beta). Follow the on-screen instructions.
Step 2: Visit the CodeWeavers website and enter your name and email address to access the free trial.
Step 3: Click the red Download Trial Now button. Chrome will retrieve a DEB file from the website and save it to your default download location.
Step 4: Locate and double-click on the download and click the blue Install button.
Step 5: Click the blue OK button to confirm. The app installs via Linux.
Step 6: Open the Launcher followed by the CrossOver app. You’ll likely find it within the Linux apps folder.
Step 7: Click the Install Windows Software button.
Step 8: A pop-up window appears. Click the Browse Available Applications link at the bottom to see what you can install. Alternatively, if you already have an installer, click the Select Installer tab instead.
In most cases, you can confirm the software you want, and CrossOver will begin the installation process with no trouble. In some cases, you may have to choose the right installation file from a list, so just pay close attention to file names and make sure you are choosing the one that you want.
You may also have to consent to License Agreements and similar contracts at this time. After the installation is complete, you should have the ability to launch it directly. Remember that large programs will take up significant space, which not all Chromebooks have. Luckily, there are alternate ways to use Android apps on Chromebooks and save space.
Google’s Project Campfire
We have the impression that Google was quick to take up the idea of Windows-compatible Chromebooks several years ago. That connection would give users the chance to load and run Windows 10 through a dual-boot setup.
Chromebook users with an eye for code may have caught sneaky references to “Alt-OS” within Google Chrome’s OS code. “Project Campfire” promised to blend the two operating systems together on a single device.
Google supposedly halted this project in 2019. We believe that Google may have switched its efforts to perfecting Android and Linux in Chrome OS.
However, recent reporting suggests that the project may not be dead after all. Chrome in the Chromium Gerrit repository gives some indicators to Campfire running on Eve, that’s Google’s nickname for the Pixelbook. That specific code actually refers to an “Alternate OS mode,” similar to what we have seen before, and “HID for Eve sensors Alt-OS.”
One of the most notable features of Chrome OS is its excellent source of scarce system resources. Unfortunately, though, Windows 10 demands a lot more horsepower to fire up and run than any Chrome OS.
So it is likely that only higher-end Chromebooks, like Pixelbook, could have the capabilities to hold up to that OS requirement.
Would you like to read more Windows-related articles? If so, we invite you to take a look at our other tech topics before you leave!
Use our Internet marketing service to help you rank on the first page of SERP.
![]()


