
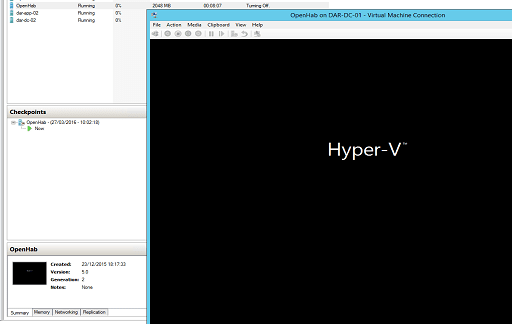
How to Fix a Windows Hyper-V Black Screen: On compatible systems, Hyper-V enables quick and simple configuration and creation of new virtual machines. When you try to connect to and start a newly constructed virtual machine, you may only get a black screen at times. This can be very frustrating.
This is a recognized issue that may be caused by several factors, including problems with the graphics card installed on your host PC.
In this article, we will walk you through several troubleshooting steps that will allow you to rapidly resolve the black screen issue with Hyper-V on Windows.
Ensure that there are no problems with the Graphics Card
Whenever you see a black screen error in either the host computer or the virtual machine, the problem most likely lies with your graphics card. Taking a screen capture of your virtual computer can often help you determine the root of the problem.
To accomplish this, connect to the virtual machine, start it up, and then wait for a black screen to appear on the screen. Next, make a screenshot of the black screen that is displayed by the VM by using the Print Screen function.
Copy the screenshot and insert it into a new Paint document to verify the appearance of the virtual machine’s boot screen. If you responded affirmatively to either of these inquiries, resolving the issue may entail updating both Windows and the graphics drivers.
Even if the screen capture only displays a blank screen, you should still check for any upgrades to the Windows operating system or the graphics driver. It would be best to install all of the available updates first and see if that helps.
Make sure you have the most recent version of Windows.
Windows updates correct bugs and make enhancements to the operating system’s performance. If you have any critical updates for your operating system or your integrated GPU that are still pending installation, try doing so and see if that helps resolve the black screen issue that you are experiencing with Hyper-V.
To check for and install available updates for Windows:
- Press Win + I to open the Settings page.
- Next, in the left pane, click on the Windows Update tab.
- Click on Check for update. If a new update is available, download and install all the updates.
- Restart your PC and check for any improvements.
- If the issue persists, try to disable your dedicated or external GPU to see if that helps.
Disable the Dedicated or External GPU
The problem with the black screen that occurs with Hyper-V virtual machines can be remedied by disabling either the dedicated GPU or the external GPU.
Your Windows computer will use the integrated graphics processor (provided by AMD or Intel) for basic visual activities by default, and the dedicated GPU will be activated only when it is required to do so.
In light of this, one potential solution to this problem is to start the virtual machine with the integrated GPU enabled but no other settings changed.
To turn off your graphics processing unit, do the following:
- Press Win + R to open Run.
- Type devmgmt.msc and click OK to open Device Manager.
- In Device Manager, expand the Display adapters section.
- Right-click on your external or dedicated GPU and select Disable device.
- Click Yes to confirm the action.
- Once disabled, close Device Manager and launch Hyper-V. Now start your virtual machine to see if it connects without any issues.
Take into consideration that the dedicated video card on your laptop may be connected to the external display connector on your laptop. Therefore, turning off the graphics device will also turn off the support for external displays on your personal computer.
Make sure that your graphics driver is up to date.
On some machines, the issue with the black screen can be caused by graphics drivers that are either outdated or corrupted. To resolve the issue, make sure the driver for your GPU is updated to the most recent version.
The Nvidia GeForce Experience and the AMD Radeon auto-detect tool are two tools that can be used to keep your drivers up to date. You can also get the most recent drivers by visiting the website of the company that made your computer.
Instructions with step-by-step explanations may be found in our tutorial on how to upgrade the graphics driver on Windows.
Make the switch from Gen2 to Gen1 for the Virtual Machine Generation.
Both the Gen1 and the Gen2 generations of virtual machines are supported by Hyper-V. The Gen2 virtual machine supports modern virtualization technologies and, by default, uses secure boot and UEFI-based firmware.
Additionally, the Gen2 virtual machine is capable of running virtualization software. This may cause compatibility problems with certain Linux distributions.
You can resolve the issue by constructing a Gen1 virtual machine and then installing the guest operating system. Gen1 is chosen by Hyper-V to serve as the default generation for virtual machines.
Consequently, all you need to do to make it a Gen1 machine is start a new virtual machine and leave the generation choice unchanged from its default setting.
How to Fix the Problem with the Black Screen on Hyper-V Virtual Machines
Even when utilizing a virtual machine, issues with the graphics device drivers are frequently the source of problems that result in a black screen.
Try installing the most recent versions of Windows and your graphics driver to see if that resolves the issue. You can also attempt to resolve the issue by turning off the dedicated graphics device that you are using as a workaround.
Smarter Fixes for Hyper-V Black Screens
Common Culprits Behind the Black Screen
Even today, a blank VM console typically signals display driver or VM configuration issues, not necessarily Windows itself.
Fixes to Try First
-
Restart the Console Connection
If the VM is running but the console remains blank, close the VM window and reconnect. Users report this resolves 20–30% of such cases. -
Update Host GPU Drivers
Outdated graphics drivers often cause rendering breakdowns in Hyper-V VM windows. Keep both host OS and GPU drivers fully updated.
VM Generation and Secure Boot Details
-
Switch from Generation 2 to Generation 1
If you’re using a Gen 2 VM, consider rebuilding it as Gen 1. Some OS builds, especially Linux variants, struggle with UEFI/Secure Boot in Gen 2 mode. -
Turn Off Secure Boot
When running Linux or custom OS builds, disabling Secure Boot may resolve black screen startup issues.
Driver Glitches Inside the VM
-
Safe Mode driver rollback
Boot the VM in Safe Mode (F8) and switch the video driver to the generic Microsoft VGA driver. Then reboot normally. This often brings the VM display back.
Dev Channel and Patch-Related Glitches
-
Fix VMware or Backup Tools Conflicts
If Hyper-V stops working after installing third-party guest tools or VMware, try disabling and re-enabling Hyper-V via Windows Features, then shut down and boot fresh. -
Address VM Config Version Mismatch
Some recent updates (e.g., KB5062553) combined with older VM configuration versions (like version 8) can block guest OS boot. Updating VM config to version 9 or 10 via PowerShell often fixes it:
Guide to Fixing Black Screens
| Symptom | Fix Strategy |
|---|---|
| Blank console despite running VM | Close & reconnect VM window |
| Outdated display | Update host GPU drivers |
| Gen 2 VM shows a black screen | Recreate as Gen 1 without Secure Boot |
| Inside-VM driver issue | Boot Safe Mode and reset to the MS standard VGA driver |
| After updates or migrations | Upgrade VM config version (PowerShell) |
Would you like to read more about how to fix Windows Hyper-V black screen-related articles? If so, we invite you to take a look at our other tech topics before you leave!
![]()


