
User Account Control, or UAC for short, is a security feature built into Windows. It protects your computer from harmful malware and prevents changes from being made without your permission.
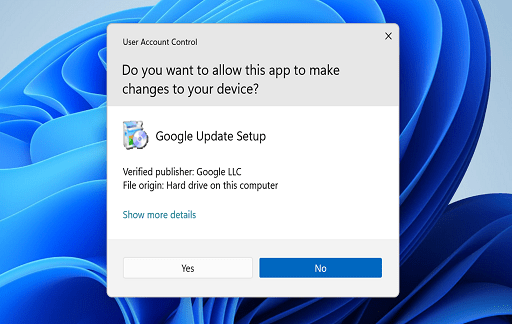
When this setting is enabled, every modification that requires administrative access will cause the User Account Control (UAC) prompt to appear, requesting the user for permission to make the elevated change.
When you are attempting to debug software or other issues on your personal computer, you may find that the User Account Control prompts that appear frequently become an irritant. This article will show you how to disable the User Account Control prompt in Windows in the event that you have a temporary need to do so.
How does User Account Control work?
The User Account Control feature, or UAC, was developed specifically to reduce the negative effects that malicious software has on operating systems that are running Windows. Any program or activity that needs administrative access must go through the User Account Control (UAC), which will question the user for consent.
You have the ability to configure the UAC security levels in Windows. You have the ability to select from one of four different notification levels using the UAC slider. The following is an explanation of what the different slider levels in the UAC settings signify and when they should be used.
- Always Notify causes the User Account Control Prompt to appear whenever an application attempts to install on your system or make changes to it. You will also receive a notification if you attempt to update the settings in Windows. In addition to this, it prevents any background processes from continuing until the user reacts.
- Notify me just when apps try to make changes to my computer This is the default UAC level, and it only alerts you when an application tries to install itself on your computer or make changes to the settings on your computer. Additionally, it stops all background processes until you respond to them.
- Do not dim my desktop; I only want to be notified when applications attempt to make changes to my PC. If you want to see the prompt but also want to disable the dimmed secure desktop UAC prompt that Windows uses, then select this option. It does not halt any tasks that are running in the background.
- Never notify – Activating this option will turn off UAC. When an application tries to install itself on your computer or make changes to it, you will not be prompted in any way. It is strongly discouraging.
How to disable User Account Control in Windows via Control Panel
The traditional Control Panel contains an option for disabling the prompt for the User Account Control. Not only can you disable UAC from this location, but you can also modify it and select when you want to be notified about changes made to your computer.
Through the Control Panel, you can turn off User Account Control by:
- Press Win + R to open Run.
- Type control and click OK to open Control Panel.
- In Control Panel, click on User Accounts
- Click on User Accounts again.
- Next, click on Change User Account Control settings
- By default, the User Account Control is set to notify you only when apps try to make changes to your computer.
- To disable the feature, drag the slider all the way to the bottom and set it to Never notify.
- Click OK to save the changes. Click Yes if prompted by UAC one last time.
When you disable UAC, Windows will not inform you if any applications try to install software or make any other modifications to your computer. This is something you should be aware of before you disable UAC. In addition, the prompt will not appear on your screen when you attempt to make modifications to your personal computer.
If you find that you need to enable UAC once more, open the settings for User Account Control and move the slider to the second level (notify me only when apps try to make changes to my computer).
It is important to keep in mind that if you are trying to make changes from an account that is not an admin account, you will be required to input the password for the admin account in order to disable or enable UAC.
How to disable User Account Control through the Registry Editor
You can also disable User Account Control on your Windows PC by using the Registry Editor and making changes to the system’s policy settings. The procedure is as follows.
Keep in mind that modifying entries in your registry can lead to potential issues, including the risk of rendering your system unable to boot up with incorrect adjustments. Before proceeding with the instructions below, it is imperative to confirm that a system restore point has been created.
- Press Win + R to open Run.
- Type regedit and click OK to open Registry Editor. Click Yes if prompted by UAC
- In Registry Editor, navigate to the following location. You can copy and paste the following path in Registry Editor as well: Computer\HKEY_LOCAL_MACHINE\SOFTWARE\Microsoft\Windows\CurrentVersion\Policies\System
- In the right pane, locate and right-click on the EnableLUA DWORD value.
- Select Modify.
- Type 0 in the Value data field and click OK to save the changes.
- Restart your computer to apply the changes.
- To enable UAC, modify the EnableLUA DWORD value and set it to 1. Click OK to save the changes.
How to Disable User Account Control Using Command Prompt
You can alter the registry entry using the Command Prompt if you need to routinely enable and stop the User Account Control feature. To ensure that there are no mistakes, it is imperative that the command be executed from an elevated prompt.
Using the Command Prompt, follow these steps to disable UAC:
- Press the Win key and type cmd.
- Right-click on Command Prompt and select Run as administrator.
- In the Command Prompt window, type the following command and press Enter reg.exe ADD HKLM\SOFTWARE\Microsoft\Windows\CurrentVersion\Policies\System /v EnableLUA /t REG_DWORD /d 0 /f
- The above command performs similar modifications as you did with the Registry Editor previously. It modifies the EnableLUA DWORD Value and sets it 0. Once done, restart your PC to apply the changes.
- If you need to enable User Account Control again, execute the following command: reg.exe ADD HKLM\SOFTWARE\Microsoft\Windows\CurrentVersion\Policies\System /v EnableLUA /t REG_DWORD /d 1 /f
- As you can see, the above command has its \d value set to 1. This will enable UAC via Registry Editor.
How to deactivate the User Account Control feature using the Group Policy Editor,
It is recommended that you make advantage of the administrative capabilities provided by the Group Policy Editor if you need to disable UAC on numerous computers that are connected to a network. Using gpedit, this is how you can disable User Account Control.
It is important to keep in mind that the Group Policy Editor is only included in the Windows Pro, Windows Edu, and Windows Enterprise operating system editions. Follow these instructions to activate gpedit on Windows Home if you are using the Home edition of Windows.
Next, use the Group Policy Editor to disable the User Account Control by following these steps:
- Press Win + R to open Run.
- Type gpedit and click OK to open Group Policy Editor.
- In Group Policy Editor, navigate to the following location: Local Computer Policy > Computer Configuration > Windows Settings > Security Settings > Local Policies
- Next, click on Security Options.
- In the right pane, locate and right-click on User Account: Run all administrator in Admin Approval Mode.
- Select Properties.
- In the Properties dialog, select Disabled.
- Click Apply and OK to save the changes.
- Similarly, if you need to enable UAC again, set the User Account: Run all administrators in Admin Approval Mode policy to Enabled. Click Apply and OK to save the changes.
Enable User Account Control to Improve Safety
The User Account Control (UAC) method may appear to be defective due to the fact that it is obviously annoying; yet, it allows you to select which applications on your system can operate in elevated mode. After you have finished debugging your system, it is essential that you remember to turn on UAC again. In addition, make sure that it is set to its default level so that it does not go off every time you make even the smallest adjustment to your computer’s settings.
Would you like to read more about disabling user account control on Windows-related articles? If so, we invite you to take a look at our other tech topics before you leave!
![]()


