Are you thinking of switching hosting providers but have misgivings about how to transfer your WordPress site to a new host? Let me tell you, migrating your WordPress website to a new host is a completely tiresome task to do, but here it is: I have some good news and some not-so-good news.
Let’s get the not-so-good news out of the way first: migrating a website to a new host is always going to get your heart racing and your palms sweaty, no matter how many times you’ve been through it.
Now, the good news: the migration process of a WordPress site to a new host follows a series of steps that you can easily replicate every time you need to. The process is quite consistent for each website migration.

What is Website Migration
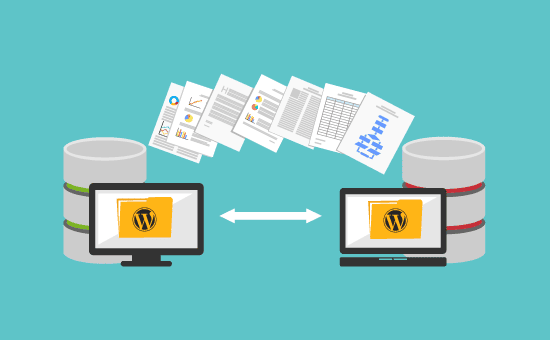
Web migration means transferring a website from one web hosting environment, platform, or domain to another. This involves the moving of the complete content, design, and functionality of the website to its new location or major makeovers of the structure and design of the website.
Website migration is done for several reasons that may include upgrading to a new platform, changing the name of the domain, redesigning the website, and changing the hosting provider.
There are a few types of website migrations:
- Domain Name Change: It involves the moving of a website to another domain. This could be due to rebranding, targeting a different audience, or acquiring a more relevant domain name.
- Platform Change: Moving a website from one content management system (CMS) or website builder to another. For example, migrating from WordPress to Joomla or Shopify to Magento.
Hosting Provider Change: The transfer of a website to another hosting provider due to better performance, pricing, or customer service. - HTTP to HTTPS Migration: The process of transitioning a website from unsecured HTTP to secure HTTPS by installing an SSL certificate. This is crucial for security and SEO reasons.
- Subdomain to Subdirectory Migration: Changing the structure of the website’s URLs, usually for better SEO and user experience.
- Website redesign or revamp: A process where a website is subjected to important changes in design and function, mostly related to content realignment and technical aspects.
Website migration can be complicated, hence requiring careful planning and execution to make sure it is smooth and that no damage occurs to the search engine ranking, user experience, or functionality of the website. It involves content mapping, establishment of proper redirects, testing in the new environment, and post-migration monitoring.
Website migration involves a lot of risks, so it is better to get help from professionals who have good experience in handling migrations. This ensures that the migration process goes smoothly and all the pitfalls are identified in advance to avoid them.
This step-by-step guide on how to seamlessly migrate your WordPress website is to reduce some of the stress that comes with the whole process.
3 WordPress Website Migrating Options
When it comes to migrating a WordPress website from one hosting provider to another, you have three primary choices:
- Request your new host to handle the migration for you.
- Use a WordPress migration plugin.
- Take the traditional route by using SFTP/FTP.
The most suitable choice for your situation will hinge on factors such as your current and new hosting providers, as well as the size of the WordPress site you intend to migrate.
You may also like: Effective guides to successful SEO Migration Strategy
-
Migration by Hosting Provider
The easiest and least stressful of all options to move your WordPress site is the first option stated above: But its viability depends on where you’re moving to. Many managed WordPress hosts for example will often have an option for free migration where they will handle the details or provide a plugin to install on your site, which makes the process happen.
For example, Flywheel gives you the option to either do it yourself with a DIY plugin or have them handle the migration for free. It’s as simple as filling out a short form on their site with your current hosting information and asking them to take care of the migration.
This may take anywhere from one to three days, but it saves you considerable time and stress in return.
-
Website Migration Using Plugin
As earlier stated, if your fully managed hosting service does not offer migration services, then they must provide a plugin that you can install on your website to help you migrate. Migrating with the provider migration plugin is relatively easy to do.
Normally these plugins can be installed using an installation wizard that will gracefully walk you through the smooth migration process of WordPress files and databases from one location to another.
Moreover, they even handle for you the automatic installation of WordPress on the new site so it will be ready to receive the uploaded files and database.
If you are not using a fully managed host, an alternative plugin option is the All-In-One WP Migration plugin.
You may also like: Website Migration with Bing
Here are the steps to migrate a WordPress site using a plugin:
- Step 1: Log in to the backend of the WordPress site you intend to migrate.
- Step 2: From the WordPress dashboard, navigate to the Plugins section and click on “Install New.”
- Step 3: Search for “All-In-One WP Migration” and install the plugin developed by ServMask.
- Step 4: Enable/activate the plugin.
- Step 5: Replicate steps one to four on the new WordPress site (the one designated for migration) to ensure the plugin is installed on both the old and new sites.
- Step 6: Install the Regenerate Thumbnails plugin by Alex Mills onto the destination site where you intend to migrate.
- Step 7: Perform updates for ALL plugins, themes, and WordPress core files on BOTH the old and new sites (Note: Ensure that the WordPress version is consistent on both sites).
- Step 8: Generate an export file using the “All-in-One WP Migration” plugin.
- Step 9: Optional: Incorporate a rule to “Find” your new site’s database prefix and “Replace” it with the database prefix from your old site (only if necessary).
- Step 10: Generate an Export File and download it to your computer.
- Step 11: On the new site, access the “All-in-One Migration” plugin and import the file from the previous step.
- Step 12: After uploading the file, follow the instructions to apply the imported export file to the new site.
- Step 13: Navigate to Settings > Permalinks and save changes multiple times.
- Step 14: Verify the activation status of all your plugins.
- Step 15: Examine the media library. If images are missing, use the Regenerate Thumbnails plugin to potentially reactivate them.
- Step 16: Scrutinize all pages, posts, and other content elements to ensure everything appears as intended. Afterward, refresh your newly migrated WordPress site to assess its appearance.
- Step 17: Install the Better Search Replace plugin developed by Delicious Brains on the new site.
- Step 18: Within the WordPress dashboard, navigate to Tools > Better Search Replace.
- Step 19: Input your old site URL into the “Search for” field.
- Step 20: Enter your new site URL into the “Replace with” field.
- Step 21: Initiate a dry run. If satisfied with the dry run outcome, proceed to run the plugin in actual mode.
- Step 22: Review theme files, especially style.css and possibly PHP files, to ensure all occurrences of the old website have been replaced with the new website
- Step 23: Inspect your new site. If the modifications are not evident, clear your browser cache. If the changes still aren’t visible, clear your server cache.
Note: The All-In-One WP Migration plugin has a site size limit of 128MB for migration.
For considerably larger websites, the following alternative plugins can assist you in migrating your WordPress site from one host to another:
- Duplicator.
- UpdraftPlus.
- Migrate Guru.
Prior to proceeding, ensure to thoroughly review all instructions associated with the chosen plugin. This guarantees its suitability for the specific type of migration you intend to undertake.
You may also like: Free SEO Tools and Plugins for Beginners
-
WordPress Site Migration With SFTP/FTP
For numerous migrations, using a plugin should suffice. Yet, for migrations of a more intricate nature, manual migration of your WordPress site might be necessary. This can be accomplished either via the File Manager in your hosting provider’s cPanel or by using an FTP or SFTP connection.
To access via an SFTP/FTP client such as Filezilla or Cyberduck, you should contact your hosting provider(s) for instructions on setting up the connection. You will often need your hosting account’s username and password, the FTP or SFTP address, and the correct port number.
Here are the steps to migrate a WordPress site using SFTP/FTP:
- Step 1: Using either the File Manager in cPanel or the SFTP/FTP connection, navigate to the root folder (typically labelled as public_html) of the destination site for the migration. If you’re uncertain about the location of the root folder, consider contacting your hosting provider as it might have an alternative name for security reasons.
- Step 2: If you are using the File Manager in cPanel, opt for “public_html” and proceed to download it to your computer.
- Alternatively, if you’re using an SFTP/FTP client, select the “public_html” folder and download it to your computer. For a smoother migration process, consider creating a compressed zip file of the downloaded folder.
- Step 3: The next step involves downloading your WordPress databases. Log in to phpMyAdmin on the hosting platform where the site currently resides.
- Step 4: Proceed to export the database. (Note: If you encounter multiple databases listed in phpMyAdmin, you might need to consult your hosting provider to determine which database to use).
- Step 5: Select the specific database for export. Click on “Export” and then choose “Quick” as the export method and “SQL” as the file format. Finally, click “Go.”
- Step 6: If you plan to use phpMyAdmin for importing the site, you can compress the database into a zip file after downloading it to your computer. Alternatively, within phpMyAdmin, you can opt for compression before downloading.
You may also like: How to Move Windows 10 to SSD (Solid-State Drive)
- Step 7: There should not be any installation in the destination site.
- Step 8: Go to your new host and set up a new empty database. In cPanel, open “MySQL Databases” and proceed by naming your new database followed by a click on the “Create Database” link.
- Step 9. In the “MySQL Users” area, click Create a New User. Create a username and password, then click Create User. Remember that at the time of creation, you will need to update the usernames and passwords in the wp-config.php file.
- Step 10: Attach the user to the database by clicking on “Add User to Database,” select the new user and the database, then click on “Add.”
- Step 11: Next, you’ll have to open the wp-config.php file from the WordPress files you downloaded. Make sure that you edit the values here if you have created a new database, “DB_NAME”, a new username “DB_USER”, and/or a new password “DB_PASSWORD”, then save the file.
Before proceeding, make sure you create a copy of the original wp-config.php file and save it somewhere else on your computer.
This is a precaution that ensures you have a record of the database information in case something goes wrong, and you need data off of the current site location.
- Step 12: Go to the phpMyAdmin of the new site. Select the newly created blank database. Select the SQL database, that was exported earlier from the old location, and import it. To accomplish this, select the newer database in the left-hand window, click on “Import,” click “Browse” to select the import file, and click “Go.”
Choose the zip file of your database you have exported earlier, and make sure that it is prepared for the import in SQL file form. Click “Start Import.” - Step 13: Your next step would be to upload the WordPress files to the new installation. Open the File Manager in the cPanel of the newly created site installation, or connect via SFTP/FTP to the new site’s location. Now, upload the “public_html” folder to its new location.
- Step 14: In the case of migration from a staging site, subdomain, or different domain name, you may install plugins like Better Search Replace on the migrated site. The plugin helps in replacing all the old site URLs with new domain name URLs.
You may also like: How To Download Windows 11 ISO Legally and Install Windows 11
How to Pointing Your Domain Name To The New Website
Once you have successfully migrated your WordPress site to a new host, the next step involves connecting your new site to your domain name.
To accomplish this, you can either update the new IP address in the DNS records or if you prefer to retain the DNS records on your web hosting, you can modify the nameserver settings on your domain hosting account.
Here is a step-by-step guide:
- Step 1: Log in to your domain hosting account. (For the purpose of this demonstration, I’ll be using Namecheap.)
- Step 2: Select the specific domain that you intend to use for your new site.
- Step 3: Click on “Manage Domain” and then choose “Advanced DNS.”
- Step 4: In the A Record section, type in “@” for Host and include the new IP address provided by your new web hosting provider in the “Value” field. The TTL (Time to Live) setting should be set to automatic.
- Step 5: In the CNAME record section, use “www” for the Host, your new domain name for the “Value,” and set the TTL to “Automatic.”
- Step 6: Save the changes you’ve made.
Adhere to the guidelines provided by your particular domain hosting provider to ensure that all DNS records are accurate and updated to direct to your new website’s location. Please be patient and allow a timeframe of 24 to 72 hours for full internet propagation to take effect.
Effortless Approach to Transfer a WordPress Website
Migration of a WordPress website can be smooth and hassle-free. If your hosting provider cannot handle the migration, there are plugins available that simplify the entire process. In certain exceptional cases, you might need to resort to SFTP/FTP for migrating a more intricate site.
Nevertheless, the steps involved in WordPress migration are consistently similar but make sure you allow enough time for the migration process. You will be proficient in transferring WordPress sites from one host to another effortlessly with practice!
Would you like to read more about how to move a WordPress Site to a New Host-related article? If so, we invite you to take a look at our other tech topics before you leave!
Use our Internet marketing service London to help you rank on the first page of SERP.
![]()


