
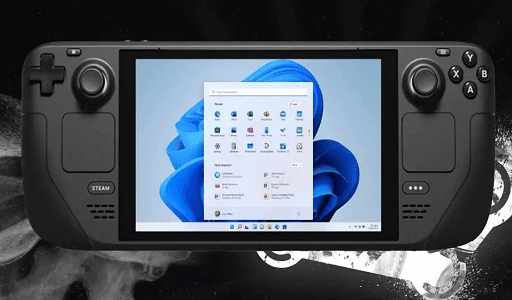
How to install Windows 11 on Steam Deck: Now that Valve has officially released drivers for Microsoft’s operating system, Windows 11 and Windows 10 work on the Steam Deck. However, it is not as simple as clicking a download button.
In this guide, we’ll show you how to install Windows on the Steam Deck, both to the internal SSD and from a microSD card.
Although Windows isn’t perfect on the Steam Deck, installing it (or booting from it with a microSD card) can help transform the Steam Deck into a laptop replacement. We’ll show you how to perform a full installation to the SSD as well as boot to Windows from a microSD card. The latter will preserve the original SteamOS installation.
Before you begin, keep in mind that the Steam Deck does not technically support Windows 11. TPM is required by Windows 11, and the Steam Deck does not have it enabled.
You can still install Windows 11 by following the steps below, but you may not receive Windows updates via the Windows partition manager.
How to Boot from a microSD card or USB drive
I recommend that you boot from a microSD card or USB drive before installing Windows on the Steam Deck. Because this is completely reversible, you can test out Windows without erasing anything from your Steam Deck. Windows isn’t perfect on the Steam Deck, and reinstalling SteamOS is a major undertaking in and of itself.
I’m using a microSD card, but any UHS-1 microSD card with at least 32GB of storage or a USB 3.0 drive with at least 32GB of storage will work.
The Steam Deck works with both Windows 10 and Windows 11, and the process is the same regardless of which operating system you use. Here, I’m running Windows 10.
- Head to Microsoft’s website and download the Windows 10 media creation tool. If you want to use Windows 11, download the Windows 11 creation tool (under Create Windows 11 installation media).
- Download Rufus, which is what will allow you to create a bootable version of Windows on your microSD card or USB drive.
- Download the Windows drivers for Steam Deck from Valve. Put them all in a folder together on a spare USB drive for access later.
- Open the Windows Media Creation Tool and select Create installation media. On the next page, choose ISO file, and choose a place to store it on your PC. Wait until the process is done, and make sure to keep a note about where you stored the ISO.
- Plug in your microSD card or USB drive and open Rufus. Note: Continuing here will erase all data on your microSD card/USB drive. In Rufus, select your microSD card or USB drive under Device. Then, choose Select next to the Boot selection section. Navigate to the Windows ISO that you created earlier.
Select Windows To Go from the Image menu. Then, under the Partition scheme, select MBR. Rename the drive if desired, and then click Ready to begin the flashing process.
- Once it’s done, eject the microSD card and insert it in the Steam Deck. Turn off your Steam Deck completely, and then hold down the Volume down button as your power it on. This will enter the boot manager.
- Select your SD card to boot into Windows. It will boot in portrait mode on the Steam Deck.
Windows does not actually install here, so continue with the setup process, as usual, selecting your language, keyboard layout, and so on. Although a keyboard and mouse are useful, you can complete the setup with just the touchscreen.
- Once you’re in Windows, head to Settings > System > Display and find the Display orientation option. Select Landscape to flip the screen to the proper orientation.
- Finally, plug in the USB drive that you stored the Windows drivers on. Plug it in using your USB-C hub (not directly into the Steam Deck) and install the drivers.
That’s all. When you restart your Steam Deck, it will return to SteamOS, but you can always boot into Windows by using the boot manager.
Do not confuse this procedure with dual booting. Because the Steam Deck does not currently support dual booting, you must choose between Windows and SteamOS for a long-term solution.
You may also like: Microsoft Windows 11 2022 Update: What we know about the New OS
How to install Windows 11 on Steam Deck’s SSD
You can install Windows directly to the SSD if you only want it on the Steam Deck. To do so, you’ll need to erase all of the data on the SSD, including your games, settings, and SteamOS itself. Valve promised a native dual-booting option in a future SteamOS 3 release, but it has yet to appear.
It is possible to restore SteamOS on the Steam Deck, but it is time-consuming. Use the method above if you just want to play around with Windows. Continue if you want to dive into the full experience and don’t mind losing your data.
- To start, you need to create a Windows installation drive. We outline how to do that in our guide on how to install Windows 11, but the process is straightforward.
Create an installer on your USB drive using the Windows media creation tool. A USB drive with at least 16GB of storage is required, but the tool will walk you through the process otherwise.
- Power down your Steam Deck completely and connect your USB drive with a USB hub. Although you can connect the drive directly, I strongly recommend connecting it to a USB-C hub to avoid any issues. A keyboard and mouse are good for installation, too, and a USB-C hub will allow you to connect those peripherals.
- Power on the Steam Deck while holding the Volume down button to enter the boot manager. Select your USB drive with the Windows installer to continue.
- Like before, Windows will boot in portrait mode. Select the Windows version you want and then choose Install now. I highly recommend connecting a keyboard and mouse here. You can get through installation with the touchscreen, but the Steam Deck’s keyboard and the touchpads won’t work.
Once this is done, you will be prompted to activate Windows. If you have a product key, enter it here, otherwise select I don’t have a product key to proceed.
- On the following screen, choose Custom: install Windows only. You’ll need to delete partitions on the Steam Deck in order to install Windows.
A quick note: This will remove all data from your Steam Deck, including games, settings, and any saves/media that haven’t been uploaded to Steam Cloud. You can later restore SteamOS, but you’ll have to reinstall all of your games and reconfigure your settings.
- Choose a partition you want to delete and select Delete. I recommend choosing the largest of however many partitions you have. The 512GB model, at least, comes with eight partitions.
- Choose the partition you deleted, which should show up as Unallocated space, and select Next. Windows will begin installing on the drive.
- After a bit of time and an automatic reboot, you’ll load into the normal Windows setup. Proceed as you would above, selecting your keyboard layout, and language, and skipping the Wi-Fi section.
- Windows is installed at this point, so all you need is a bit of cleanup. Head to Settings > System > Display and switch Display Orientation to Landscape.
Grab another USB drive containing the Steam Deck Windows drivers and install them as well. SteamOS is no longer available, so you’ll have to restore it if you want to go back.
You may also like: How to enable phishing protection on Windows 11 2022 Update 22H2
How to recover SteamOS on the Steam Deck
You can uninstall Windows from the Steam Deck’s SSD if you want to. Valve provides a Steam Deck recovery image that will restore SteamOS if you’re willing to factory reset your Steam Deck again.
- To start, download the SteamOS recovery image from Valve.
- Download Rufus on a separate Windows PC and insert a USB drive. Write the SteamOS recovery image to the USB drive and eject it from your PC.
- Power down the Steam Deck completely and connect the USB drive using a USB-C hub. Hold the Volume down button while powering on the Steam Deck to enter the boot manager. Select your USB drive from there (it should be “EFI USB Device”).
- After some time, you will boot into the recovery environment. There are a few options here that will attempt to preserve your data, but I recommend using the Re-image Steam Deck option.
To get the Steam Deck to work if you’re coming from Windows, you’ll need to factory reset it. Trying the other options will not keep your games if you’ve already installed Windows, and they may cause file system conflicts.
You may also like: How to dual-boot on Windows 11
Troubleshooting Windows on Steam Deck
If you are installing from scratch, make sure the partition you choose is formatted as NTFS. Otherwise, it might not work with Windows.
Some games simply run better in Steam OS than in Windows, especially when using workarounds. If you’re experiencing performance issues with your game, it could be due to Windows: You might want to follow our instructions to revert to SteamOS.
To use the Steam Deck control pad, your games may need to be booted through Steam on Windows. There’s also the SWICD workaround for games that aren’t on Steam, but that requires an extra step and customization process.
There may be limited compatibility with audio drivers. Optimal audio performance can be achieved by using Windows 11 along with its latest updates. We highly recommend utilizing a portable SSD instead of a microSD card for regular Windows usage on the Steam Deck.
Would you like to read more about How to install Windows 11 on Steam Deck-related articles? If so, we invite you to take a look at our other tech topics before you leave!
![]()


