How do I turn off PIN login on Windows 11: You may log in to your computer using a variety of methods thanks to the Windows Hello feature, which is included in Windows 11.
These methods include fingerprint recognition, iris scanning, facial recognition, security keys, and PINs. PIN sign-in is often chosen over traditional password logins due to the fact that it is not dependent on the hardware being used and is simpler to remember.
During the initial start-up of Windows 11, you will be prompted to create a PIN by the system. This is the default behaviour. If you choose to skip this step, you will be able to add it later using the Settings app.
In light of this, if you feel the need to implement a PIN security measure on your Windows 11 computer, the following is a comprehensive guide that walks you through the process step by step.

Advantages of using a Windows Hello PIN instead of a Password
PINs stored on a safe device are typically preferred over passwords, even though passwords are the standard method we use to access our internet accounts. This is why:
One of the most significant benefits of a personal identification number (PIN) is that it typically comprises of a four- to six-digit numerical code. While it is possible to use a combination of letters and other special characters as your PIN, it is typically simpler to remember and communicate a code that is made up entirely of digits.
- A Trusted Platform Module (TPM) compatible device is necessary in order to use the PIN sign-in feature that is included in Windows Hello. Therefore, a Windows PIN is guarded by the hardware of the system, making it extremely difficult to decipher or fake.
- For local users, logging in with a PIN rather than the more traditional method of entering a password saves time and is more secure. In contrast to a Microsoft account, a personal identification number (PIN) can be used to log into a single machine.
- Additionally, it may be used without an active Internet connection, in contrast to the Microsoft account sign-in process, which needs a working Internet connection to complete.
- You are able to provide another user access to your Microsoft account by sharing your sign-in PIN with them; however, they will not have access to your password.
Check out our article on “PIN or Password?” if you are still unsure about what kind of security measure would be best for your personal computer. What should I use that is more secure in Windows 11? article for a discussion that is far more in-depth. Now that you are aware of the benefits it provides, let’s take a look at how to configure, modify, and delete a sign-in PIN using the Settings app in Windows 11.
How to configure a PIN for your Windows User Account
In the Settings app, you have access to all of the sign-in customization options for Windows 11. It provides the ability to set up facial and fingerprint recognition, as well as a personal identification number (PIN), a security key, and a password.
To set up a sign-in PIN using Windows Settings:
- Open the Windows System Settings.
- In the left pane, click on the Accounts tab.
- Next, click on Sign-in Options.
- Click on PIN (Windows Hello) to expand, and click on Set up.
- Next, enter your account password and click OK to authenticate the user account.
- In the Set up a PIN dialog, type in the PIN in the New and Confirm PIN fields. By default, it only accepts numerical digits. If you want to include letters and symbols, check the Include letter and symbols option.
- Click OK to save the changes.
You can now log in to your computer using the Personal Identification Number (PIN) you just set up. Windows will assign the personal identification number (PIN) as the default sign-in option even if you have previously enabled password sign-in. To view additional sign-in options, on the screen where you enter your information, click on the Sign-in options link.
How to Change or Delete Sign-in PIN
If you have recently divulged your personal identification number (PIN) to another individual, updating it as soon as possible is one way to ensure the safety of your system. If you run into an error saying that your PIN isn’t functioning on Windows 11, you might also want to consider changing your PIN.
Fortunately, you can easily change and remove the sign-in PIN from the Settings app.
- Press Win + I to open Settings.
- Open the Accounts tab and click on Sign-in Options.
- Next, click on PIN (Windows Hello).
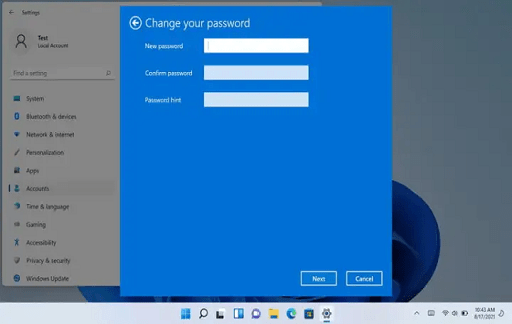
- To change the PIN, click on Change PIN, enter your current PIN, and then your new PIN. Click OK to save the changes.
- To remove the PIN, click on Remove, and read the description. Click on Remove again and then enter your account password and click OK.
Is using a login PIN safer than a password
The Windows Hello PIN locks and unlocks the device with the help of a Trusted Platform Module (TPM) chip, which makes the device resistant to tampering by malicious programs.
In addition, a PIN is associated with a particular device. Therefore, in contrast to a Microsoft account, even if the PIN is stolen, it is meaningless if one does not have access to the specific device.
A Personal Identification Number (PIN) surpasses a local password in both security and sign-in speed. While it’s widely known that this sign-in method can encounter occasional issues, having an alternative login option, like a password, can be a valuable fallback.
Would you like to read more about PIN login in Windows 11-related articles? If so, we invite you to take a look at our other tech topics before you leave!


